If you have decided to return your horn or are sending us a horn
we have purchased from you, this information is vital. Most of
the damage to fine old saxophones these days is done in
shipping. There is no magic to properly packing an instrument
for shipping and most of it is common sense but the almost
unbelievable things we see when horns arrive here makes us worry
that this sense isn't so common after all. So take a look at the
suggestions below, follow the procedures and suggestions and
your horn has the best chance possible of arriving at the
destination in one, possibly playing, piece of horn.
|
All the photographs below are Thumbnails. Click on the picture
for a larger view.
|
|
1. The Whole Secret Is Immobility
Most of the damage we see on poorly packed horns is either
damage to the keywork that renders it un-playable or damage to
the bell rim or bell, the "kinked" bell rim being the one that
we see the most. This nasty stuff has one cause: The horn is
able to move within its container and that allows it to get up
the head of steam needed to bend brass.
Almost all of the packaging instructions
that follow are designed to immobilize the instrument within the
case and the case within the box. This we need to do absolutely,
however, not so that the very holding force we produce is
sufficient to itself damage the horn. There is a middle ground,
a "Goldie Locks" point where the horn is unable to move but not
at the cost of bending stuff.
So now that you get
the idea of the ultimate goal, let's get started.
|
|
2. Selecting The Best Case In Which To Ship
This, unfortunately, is most probably the
area over which you have the least control. The horn probably
has a case to which it is mated or that is part of
the deal so we need to address both the best and worst case in
which to ship and how to play the cards you are dealt.
|
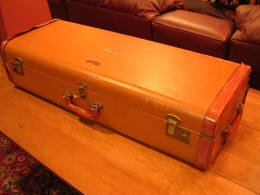 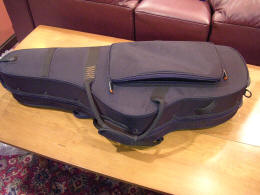 |
There are, as you know, two basic models of saxophone case; the
old fashioned "trunk case" or the more modern fitted case. Each
has its good and bad points but I think that common |
knowledge holds that the fitted case provides better
protection given that they are both handled with some amount of
care.
The reason is simple in that the trunk case is just plywood and
felt. Particularly the early "vintage" cases which may be nice
and nostalgic but provide almost no protection from rough
handling. The modern cases, which are made from various layers
of rigid foam covered in a hard ABS plastic and nylon fabric
sandwich, are so able to protect your horn that you could just
slap a UPS shipping label on it and feel pretty certain that it
would make it to destination without damage. Now, no one would
do such a foolhardy thing but the case performs that well.
|
|
3. Preparing The Horn
The horn is prepared for shipping by a
process we refer to as "corking". The purpose is to render
those keys on the horn that naturally remain open immobile
by holding them gently but firmly closed. We use blocks of soft
foam stuffed between the top of the key and the surrounding structure. We
use soft foam because we don't want to put too much force on the
key work and damage the instrument while trying to protect it.
DANGER! Never,
ever put anything in the space
between the pad and the tone hole. DO NOT try to "cork" the horn
by stuffing foam or bubble-wrap or anything else in the pad
opening, ever. It will damage the horn and cost
you money.
We could go through naming all the keys
that need to be closed but it's really pretty obvious. We just
don't want any keys clanking about during shipping.
|

|
|
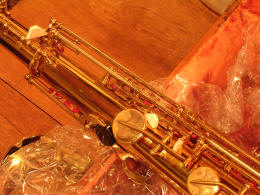
On the upper keys where there is no handy bell to stuff the
foam against, we have to resort to the older and more difficult
method of putting something under the little timing foot of the
key to hold it closed. Here we've used white foam wedges
to hold the keys closed but the traditional material for the
wedges is cork, hence the name for the process. To identify the
timing foot needing corking just operate the open key and look
on the other side to see which foot rises. Then put a wedge of
cork under it. |
 |
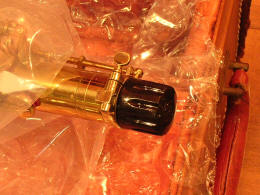
Also be sure to put on the saxophone end stopper to
protect the little neck octave key actuator arm, that little
stick of brass that sticks up above the upper end of the
saxophone body. Fixing it can be a big job. |
 |
|
4. The Actual Packing - The Beginning
We recommend using bubble wrap for all the
packing rather than plastic "peanuts" but for a different reason
than you might imagine. We use primarily wrap because we want the
recipient to enjoy getting
the instrument as part of an entire
purchase experience and peanuts are a pain in the posterior for the un-packer.
What a mess. Great
for the packer but the up-packer, not so much. Bubble wrap is
neater and can be depended upon to stay in place in the case and
in the box.
Bubble wrap comes in two sizes, little
bubble and big bubble. The big bubble provides the best
protection but is harder to work with. We tend to use the big
bubble stuff as much as possible and just use the small bubble material in
places where big bubble just won't fit.
Note: Try to avoid using tape on the bubble
wrap when you wrap something. Just surround the object with the
wrap and tuck it into the case/box. It can't get away, it's in a
friggin box, and it again enhances the enjoyability of the whole
purchase not to have to fight sticky clear plastic tape.
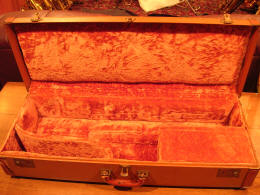
Since the vintage trunk case is the harder
to pack we'll concentrate on packing it. We start by spreading a
large sheet of big bubble wrap across the entire case opening.
|
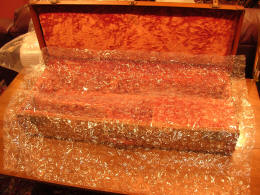 |
Notice that we have pulled up enough wrap on the lid side to
cover at least half the horn once it is put into the case.
Bubble wrap
is easily cut with scissors and we trim it so that it is
slightly larger then the case opening. |
5. Adding the Horn
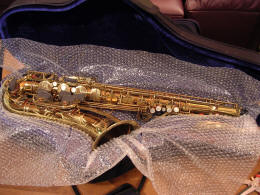
Next we finally get to
actually put the horn into the case. Your
job is to firmly but gently (those words again) nestle the
instrument down into the nest of case and bubble wrap you have
prepared. Don't be surprised if it takes a bit of a push to get
it down into the case. If you have to push down, DO NOT push on
the keywork. That will yank any horn, no matter how well built,
out of adjustment. You may push on the key guards or the rim of
the bell but not on the rods or keys. |
 |
The fitted, sometimes called a "ProTec" style case after one
of the top manufacturers of fitted cases, is the same only
easier. In the fitted case we use small bubble wrap and lay a
nice sized piece over the open case and then put the horn on top
of it. You can then nestle the horn down into the case. If it
won't fit, that's a good thing and you can omit the bubble wrap.
Actually, that happens often with these cases. |
 |
6. Padding the Case
Once the horn is in place and you are happy with its security,
tuck the extra wrap around and under the horn to provide any
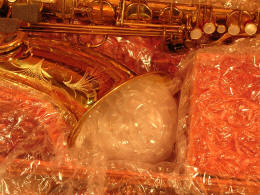
extra security that you can. Next, on a trunk case, roll up a
couple of feet of big bubble wrap[ and double it over into a
crude ball. Then put the ends of the folded roll into the bell
and force, as gently as possible while still getting the job
done, into the bell. This is to provide a solid but resilient
object to hold the bell away from the side of the case.
Then take small strips of bubble wrap and roll them up and stuff
them into any open places in the case around the horn.
7. The Neck
Basically the
same is done with the neck as was done for the rest of the
horn. Wrap it in bubble, large or small, using
no tape and tuck it into the neck
slot if one is provided. If it is not, you'll need
to tuck it into the accessory box that almost all trunk cases
have.
|

|
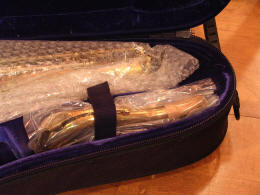
The fitted case, like almost every other operation in
packing, is much easier and you can just put the neck, wrapped
in one thin wrap of small bubble or even just a plastic bag into
the space provided. We use some kind of plastic to keep the neck
from suffering abrasion from the case lining material. If the
case does not have a dedicated neck slot, as in SKB cases, you
will need to wrap the neck well or put it into its neck bag and
put it into the bell. Cases like this use a neck bag and are
carried in the bell whenever the case is used. |
 |
8. Close It Up
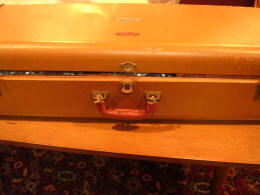
We're about
done. Finally. Now there's nothing to do but try to close the
case and see how everything fits. On trunk cases you will hope
that the case lid fails to close by about one half inch.
That will provide a very slight compression when you force the
lid closed. Much more compression and you will begin to enter
the area where your lovely packing itself may bend a key or even
the body of the sax. |
 |
9. Finally Finished
So,
once the case is closed and you have verified your work by
vigorously shaking the case and sensing no movement, you are
ready to put the case into the shipping box. Now that you have
some confidence that you have a shippable horn/case package you
can pretty much treat it like any other fragile item and box it
in a sturdy cardboard box of at least 200 PSI strength and that
provides at least 3 inches of space around the horn case on all
sides. These spaces you should fill with something soft and
resilient. Bubble wrap again is perfect, plastic peanuts is a
second choice and will be the one used by a commercial packer
like the UPS Store, and then there's packing paper wadded up and
stuffed tightly into the box around the case on all sides.
Again, the test is a vigorous shaking. When, and only when,
you are certain that you have immobilized the instrument within
the case and the case within the box can you confidently slap
that shipping label on and hand it to the shipper. Exhale only
when you get the phone call from the happy recipient.
Work Carefully,
Robin & Rob Dorsey
This Old Horn,LLC |
 |